With Yamaha R6 graphics kits taking center stage, get ready for an exhilarating journey where style meets performance. These custom-designed kits transform your motorcycle into a head-turning masterpiece, allowing you to express your individuality and enhance its aesthetic appeal.
From the selection of high-quality materials to the intricate design process, every aspect of Yamaha R6 graphics kits is meticulously crafted to deliver exceptional results. Dive into the world of customization and discover how these kits can elevate your riding experience.
Introduction to Yamaha R6 Graphics Kits

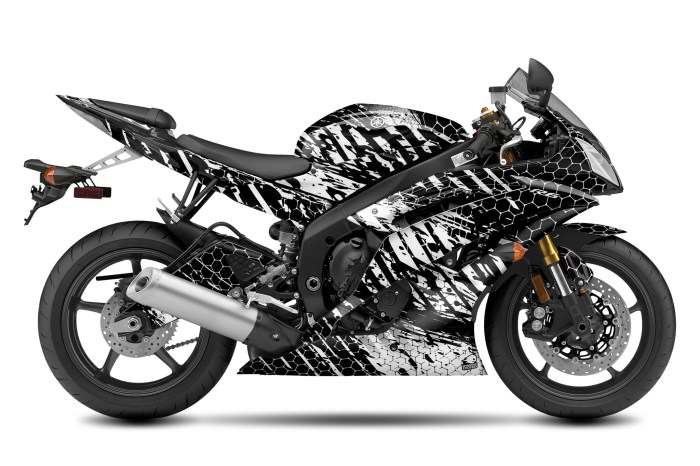
Graphics kits are designed to enhance the aesthetics of motorcycles, offering riders a way to personalize their machines and stand out on the road. Yamaha R6 graphics kits are particularly popular due to the bike’s sleek and sporty design, which provides a perfect canvas for eye-catching graphics.
These kits typically consist of high-quality vinyl decals that are precision-cut to fit the specific contours of the R6. They are available in a wide range of colors, patterns, and designs, allowing riders to create a look that truly reflects their personal style and preferences.
Materials and Design: Yamaha R6 Graphics Kit
Yamaha R6 graphics kits are typically made from high-quality vinyl, which is durable, weather-resistant, and easy to apply. The vinyl is available in a variety of colors and finishes, so you can create a custom look that matches your style.
Whether you’re looking to enhance the aesthetics of your Yamaha R6 with a graphics kit, or you’re seeking to improve its performance, there are numerous options available. For those interested in boosting horsepower, exploring the yamaha r6 hp can provide valuable insights.
However, if your primary focus is on customizing the appearance of your motorcycle, a graphics kit can transform its visual appeal, making it stand out on the road.
The design process for creating custom graphics kits is relatively simple. First, you need to choose a design template. There are many different templates available online, or you can create your own. Once you have chosen a template, you can start adding your own graphics and text.
Design Styles
There are many different design styles that you can use for your Yamaha R6 graphics kit. Some popular styles include:
- Racing stripes:Racing stripes are a classic design that gives your bike a sporty look.
- Tribal graphics:Tribal graphics are often used to create a unique and eye-catching look.
- Abstract designs:Abstract designs can be used to create a one-of-a-kind look that is sure to turn heads.
Application and Installation
Applying graphics kits to a Yamaha R6 requires meticulous preparation and execution. Follow these steps for a professional-looking installation:
- Clean and Prep the Surface:Clean the fairing thoroughly with a mild detergent to remove any dirt or debris. Use a tack cloth to remove any remaining dust or particles.
- Align and Position:Carefully align the graphics kit pieces on the fairing, ensuring they are properly positioned. Use masking tape to temporarily hold them in place.
- Apply Heat:Use a heat gun or hair dryer to warm up the graphics kit and the fairing surface. This will make the vinyl more pliable and easier to conform to the curves of the fairing.
- Apply Pressure:Starting from the center, use a squeegee or a clean cloth to apply firm pressure and smooth out any wrinkles or bubbles. Work your way outwards from the center to the edges.
- Trim Excess:Once the graphics kit is applied, use a sharp razor blade or a hobby knife to trim any excess vinyl around the edges.
Tips and Techniques
- Use a sharp razor blade or a hobby knife for precise trimming.
- Work in a clean and well-lit area to ensure proper alignment and visibility.
- Allow the graphics kit to cure for 24 hours before riding the motorcycle to ensure a secure bond.
Potential Challenges
- Air Bubbles:If air bubbles appear during installation, use a pin or a needle to puncture them and smooth them out.
- Misalignment:If the graphics kit pieces are not properly aligned, remove them and reposition them before applying heat.
- Wrinkles:Use a heat gun or a hair dryer to warm up the vinyl and remove any wrinkles.
Benefits and Customization
Yamaha R6 graphics kits offer a range of benefits for motorcycle enthusiasts. They enhance the aesthetic appeal of the bike, protect the original paintwork, and allow for personalization to match individual preferences.
By applying a graphics kit, riders can transform the appearance of their R6, making it stand out from the crowd. The kits come in various designs, colors, and patterns, providing ample options to suit different tastes. Moreover, they offer protection against scratches, chips, and fading, preserving the pristine condition of the motorcycle’s paint.
Customization Options, Yamaha r6 graphics kit
Customization is a key aspect of Yamaha R6 graphics kits. Riders can choose from a wide range of pre-designed kits or opt for custom designs to create a truly unique look. Custom kits allow for the incorporation of personal logos, names, or specific artwork, enabling riders to express their individuality and make their motorcycle truly their own.
If you’re a proud owner of a Yamaha R6, you know that it’s a beast of a machine. But if you’re looking to give it a little extra personality, a graphics kit is a great way to do it. With so many different designs to choose from, you’re sure to find one that matches your style.
And if you’re curious about the engine that powers this incredible motorcycle, check out our article on the yamaha r6 engine type . It’s a fascinating read that will give you a deeper understanding of this amazing machine. Once you’ve learned all about the engine, come back and pick out the perfect graphics kit to make your R6 truly unique.
Suppliers and Pricing
Choosing a reliable supplier for your Yamaha R6 graphics kit is crucial. Consider factors like reputation, product quality, and customer support.
If you’re looking to give your Yamaha R6 a fresh look, consider adding a graphics kit. These kits come in a variety of designs and colors, so you can find one that perfectly matches your style. If you’re not sure how to install a graphics kit, there are plenty of resources available online, including detailed tutorials on how to build a Yamaha R6 . Once you’ve installed your graphics kit, you’ll be able to show off your unique style every time you ride.
Pricing varies depending on factors such as the complexity of the design, materials used, and brand reputation. Compare prices from different suppliers to find the best deal.
Customer Reviews and Feedback
Reading customer reviews and feedback can provide valuable insights into the quality of products and services offered by different suppliers.
- Check online marketplaces and forums for reviews from customers who have purchased and used the graphics kits.
- Contact suppliers directly to inquire about customer feedback and any testimonials they may have.
Additional Considerations
Choosing and maintaining graphics kits requires careful consideration to ensure optimal performance and longevity.
Factors to consider when selecting a graphics kit include:
- Compatibility:Ensure the kit fits your specific R6 model and year.
- Material:Select a durable material that can withstand weather and wear.
- Design:Choose a design that complements your R6’s aesthetics and riding style.
- Installation:Consider the complexity of the installation process and any necessary tools or skills.
Proper Maintenance and Care
Proper care is crucial for extending the lifespan of your graphics kit:
- Regular Cleaning:Use a mild soap and water solution to remove dirt and grime.
- Avoid Abrasives:Do not use harsh chemicals or abrasive materials that can damage the kit.
- Waxing:Apply a wax coating to protect the kit from fading and scratches.
- Avoid Prolonged Sun Exposure:Prolonged exposure to direct sunlight can cause fading.
Extending the Lifespan
Follow these tips to extend the life of your graphics kit:
- Handle with Care:Avoid folding or creasing the kit during installation or storage.
- Store Properly:Keep the kit in a cool, dry place when not in use.
- Inspect Regularly:Check the kit for any signs of wear or damage and address them promptly.
- Consider a Clear Coat:Applying a clear coat over the graphics kit can provide additional protection.
Conclusive Thoughts
In conclusion, Yamaha R6 graphics kits are not just mere accessories; they are an investment in self-expression and motorcycle enhancement. Whether you’re seeking a subtle upgrade or a complete makeover, these kits offer endless possibilities to personalize your ride and make it truly your own.
Embrace the freedom of customization and unleash the full potential of your Yamaha R6.

2 thoughts on “Yamaha R6 Graphics Kit: Enhance Your Ride’s Appearance and Personalization”